 automation
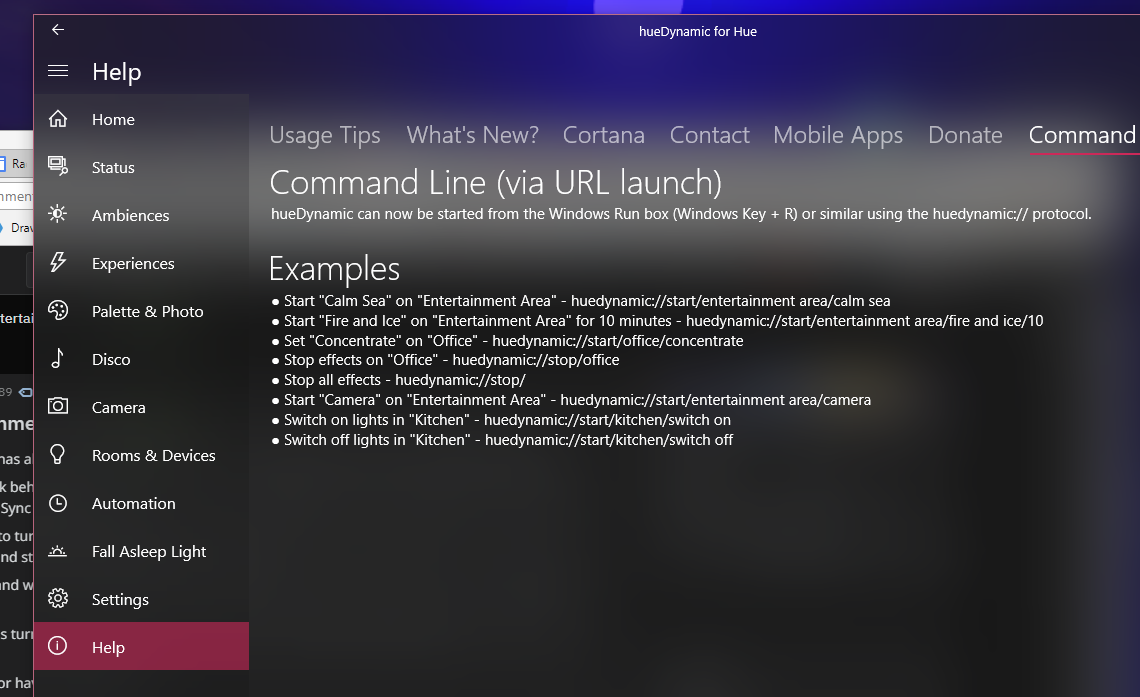
Command Line and URL Launch Options
hueDynamic can now be started from the Windows Run box (Windows Key + R) or similar using the huedynamic:// protocol.
 automation
hueDynamic can now be started from the Windows Run box (Windows Key + R) or similar using the huedynamic:// protocol.
automation
automation
hueDynamic allows you to have dynamic lighting experiences with sound and SFX. This is great for special occasions such as Halloween and Christmas.
You can have layered sound effects with synchronized lights that are triggered by your Hue motion sensors; the ultimate way to create a spooky and exciting atmosphere.
Some of the bundled ambiences and effects include:
This video demonstrates some of the spooky layered ambiences that can be associated with motion sensors. Scary stuff!
automation
hueDynamic now supports real-time synchronization of your Hue lights to your computer screen or monitor! We’ve worked hard to ensure low latency and a low CPU and memory footprint by using the DirectX APIs. This means it also works great on low powered home theatre PCs and laptops. Movie night or gaming sessions will never be the same again!
To get started, first install the hueDynamic app (from the Windows Store) on your PC, then install the hueDynamic Capture Agent from the links below. You can then go to the Camera page in the hueDynamic app and select the Screen Capture option.
hueDynamic now uses the Hue Entertainment API, which provides an ultra-fast streaming channel to your Hue lights. This means that hueDynamic screen synchronization is the best available and doesn’t rely on having to install additional software such as Razor Synapse, which can conflict with the operation of your other Philips Hue apps and accessories.

hueDynamic can still use the old HTTP API to give you a highly optimized experience if you wish, e.g. if you have a V1 Hue bridge.

The hueDynamic Screen Capture Agent runs silently in the system tray and automatically starts with Windows. It allows the hueDynamic UWP app to grab the current screen when you start the Camera mode, something that UWP apps can’t normally do. It uses DirectX and optimizes the screen data using hardware acceleration before handing it to hueDynamic app for processing and orchestration of your Hue lights.
You can of course select all the same options for the screen capture mode as you can for the web camera mode, such as average color, dominant color and number of colors to detect.
hueDynamic allows you to assign different bulbs to different sections (or zones) of your screen. For example, you could have a Hue Go behind your computer monitor that represents colors from the middle of the displayed image, a desk lamp to the left, an uplighter to the right and a ceiling light. You could even have a Hue Lightstrip under your desk and assign it to mirror the colors from the bottom of the displayed image!
The following picture shows you some of the configuration options that are available when using the screen capture agent and your Hue lights:
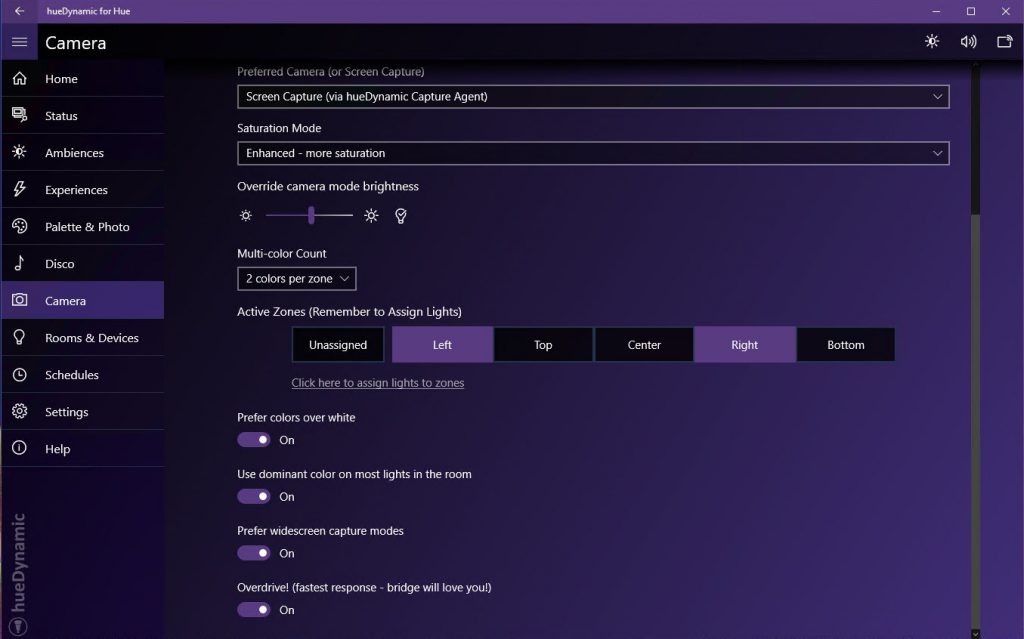
When multiple zones are enabled, image processing is spread across your available CPU cores to ensure the lowest latency!
Unlike other apps, hueDynamic works fine with exclusive full-screen mode.
However, if you encounter problems, select the Borderless Window option in your game.
We recently introduced “Overdrive!” mode. This mode is the result of weeks of research into achieving the lowest latency light synchronization possible with the Hue system. It uses slightly more CPU than the default mode, but halves the response time of the lights to changes on the screen. This mode works best with a wired network (Ethernet) connection and a smaller number of lights, perfect for gaming rigs.
The majority of the latency in Overdrive mode is purely due to the limits and overheads of the Hue bridge and the Zigbee LightLink protocol.
automation
Ever come home to have all your Hue lights on 100% brightness because of even a slight power outage or “brownout”? With the hueDynamic app, this is a thing of the past thanks to our Hue System Power Cut detection.
With a simple click, you can enable this feature in the hueDynamic app and your Hue Bridge will be programmed to recognize when its power has been disturbed. As soon as it has finished booting, it will then send a command to your lights and bulbs to switch them off for you automatically. This gives you piece of mind and also saves on electricity costs.
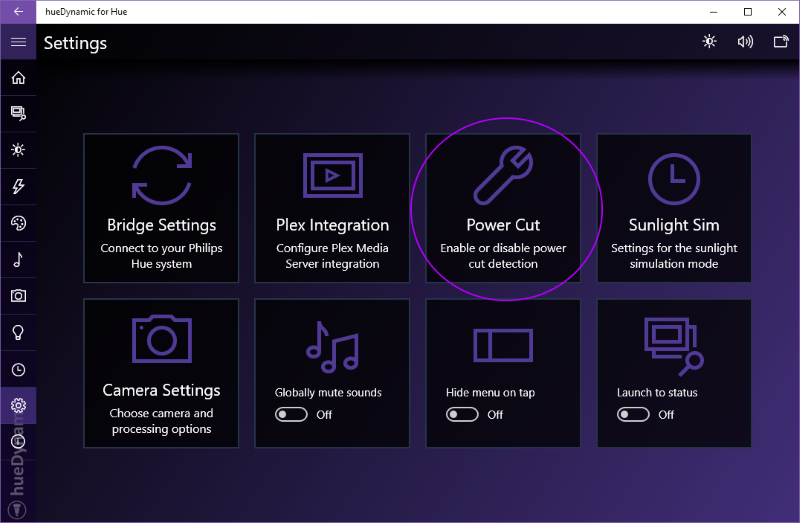
No need to mess around with rules, memories and the Hue API – just go to the Settings page in the app and select the “Power Cut” option to get started.
This feature runs entirely on the Hue Bridge, meaning you don’t need to have the app running to benefit from the power cut detection feature.
The first thing to do is connect the hueDynamic app to your bridge. Once this easy process is completed, visit the settings page in the app and select the “Power Cut” button.
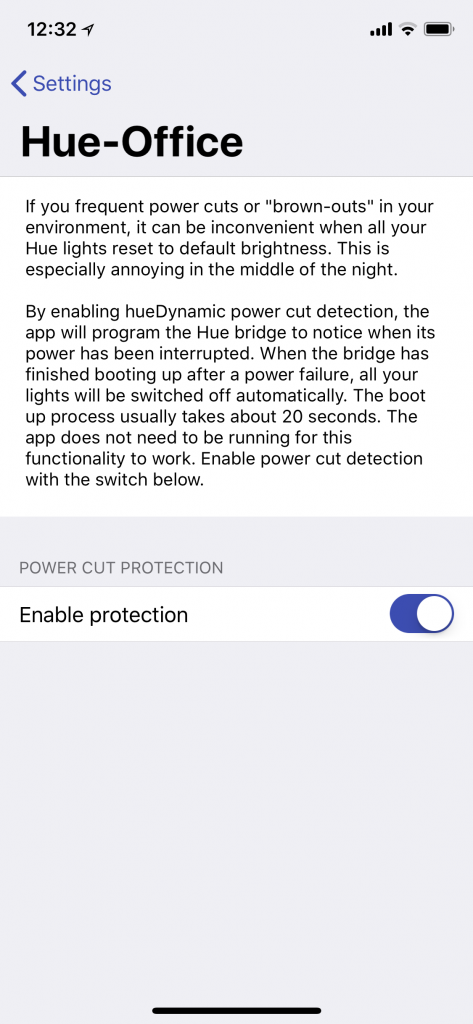
Once you have clicked the “Power Cut” button, you will see the switch to enable or disable the feature. This page will also be expanded with more options allowing you to customize in the future.
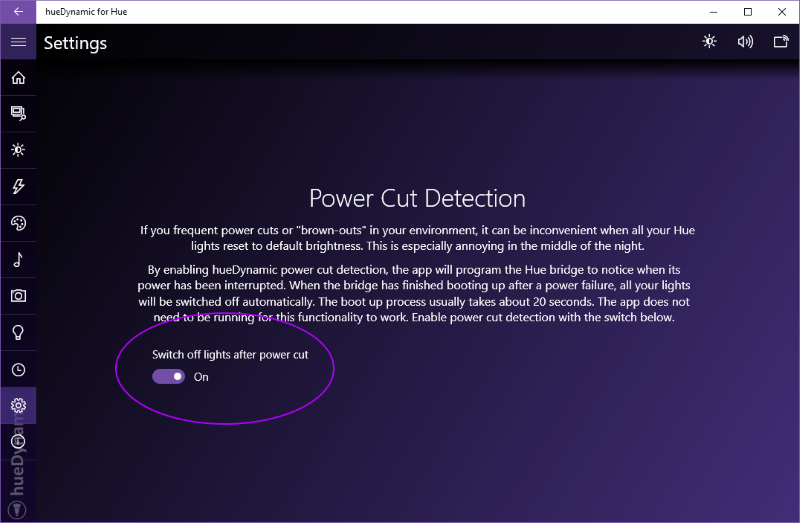
After you have enabled the switch, a confirmation message will be displayed and the power cut feature will be enabled. It should stay enabled until you switch the feature back off via the same switch, or reset your Hue bridge to factory settings.
You must be logged in to post a comment.